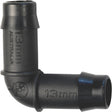
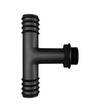
Automatic Watering and Reservoir Management: AutoPot, Drippers, Anti-Siphon Valves
An anti-siphon valve lets air into a drip line when the pump stops, so gravity can't siphon your reservoir into the pots. Fit one on pumped systems; AutoPot's AQUAvalve5 needs none.

On this page
What does an anti-siphon valve do? An anti-siphon valve is a one-way valve that lets air into a drip line the moment the pump switches off, breaking the vacuum that would otherwise let gravity keep siphoning nutrient solution out of your reservoir and flooding your pots. Fit one in any pumped dripper system where the reservoir or drippers sit higher than the pots. Gravity systems like AutoPot don't need one — the AutoPot AQUAvalve5 already controls the flow.
This guide covers both routes — gravity-fed (AutoPot) and pumped (dripper/timer) — plus reservoir hygiene and keeping the water at the right temperature all year round.
Who this guide is for: UK home and hobby growers setting up or troubleshooting an automatic watering system — no floods, blockages or root rot.
What does an anti-siphon valve do, and where does it go?
When a pump pushes solution up to the drippers and then switches off, gravity can keep that flow going — a siphon — until the tank empties across your floor. The anti-siphon valve breaks the siphon by letting air into the line the instant pressure drops, collapsing the vacuum the siphon needs.
It's the same backflow-prevention principle used on outdoor taps to keep dirty water out of the mains. Gravity systems such as AutoPot do not need one, because the AQUAvalve is itself a float valve that shuts the supply off at a set level.
You'll see "anti-siphon valve", "anti-siphon device" and the British "anti-syphon" (our own product uses the syphon spelling) — same part.
How do you fit an anti-siphon valve?
The key rule is placement: the valve must sit inside the reservoir, above the pump and above the maximum water level, so it draws in air rather than solution when it opens.
- Add a tee. Splice a tee piece into the line between the pump outlet and the drippers, after any in-line filter.
- Mount the valve on the spare leg, pointing up into the air space above the water.
- Keep it above the waterline. Below the surface it just weeps solution instead of admitting air.
- Test it. Run the pump, switch off — drippers should stop within seconds; if they keep dribbling, the valve sits too low or a line leaks.
Match the barb to your tubing — 13mm and 16mm are the common grow-room sizes.
Gravity-fed (AutoPot) vs pumped (dripper/timer): which suits you?
The first decision is whether to let gravity do the work or run a pump on a timer. Which system should you choose?
- Hands-off, no pump or timer? Choose gravity-fed AutoPot.
- Control over feed timing and volume, or run to waste? Choose a pumped dripper system.
- Pump with the reservoir above the pots? Add an anti-siphon valve.
- Still weighing DWC, NFT and drip? See hydroponic systems compared.
| Feature | Gravity-fed (AutoPot) | Pumped (dripper / timer) |
|---|---|---|
| Power needed | None — gravity only | Pump + timer (mains) |
| Anti-siphon valve | Not required (AQUAvalve controls flow) | Required if reservoir sits above pots |
| Feed control | One solution, plant-led uptake | Adjustable frequency and dose |
| Maintenance | Low — periodic flush of pipework | Higher — pump, drippers, filters |
| Runoff | Zero-runoff by design | Runoff unless run-to-waste managed |
| Best for | Hands-off, low-power growing | Precise, scheduled feeds |
For the lowest fuss, gravity wins; to dial feed timing and volume — or run to waste — a pumped dripper earns its extra parts. A basic pumped rig pairs a pump such as the Newa Maxi-MJ Pump with drippers such as the Arrow Dripper Black 2L/h and a timer; see also our water pumps and heaters. For soil and coco growers, Easy Feed modules and parts are another gravity-fed route.
How does the AutoPot AQUAvalve actually work?
AutoPot is the best-known gravity system, and the AQUAvalve is the clever bit. It runs entirely on gravity pressure from a raised reservoir — no pump, no mains pressure, no timer, no electricity. When the tray under a pot is empty, the valve opens and fills the tray to a set level of 20mm, then shuts off. Once the plants have drunk the tray dry, surface tension around the valve body breaks and the valve reopens to refill — around 30–60 minutes after the tray empties. That's a natural wet/dry cycle with no scheduling on your part.
The current AutoPot AQUAvalve5 has a 5mm inlet — around 66% larger than earlier models — takes 9mm and 16mm pipework, and clogs far less than the older version. A Root Control Disc in each pot stops roots jamming the valve (check which disc size fits your pot; the AutoPot Root Control Disc XL (Round) is one option); an AutoPot 16mm in-line filter keeps grit out of the mechanism. Raise the tank at least 15cm (6in) above the highest AQUAvalve so there's enough gravity head — a single 47L tank can feed a 1Pot system of up to six pots, and the Flexitank PRO is the larger option if you want more headroom. For pot choice and transplanting, see our pots, fabric containers and transplanting guide.
Do you need a run-to-waste add-on such as AutoDrain?
AutoPot's standard design is zero-runoff — plants use every drop. A run-to-waste add-on such as AutoDrain is the opposite: it suits growers who want runoff, to flush excess salts (which can otherwise build up and cause nutrient lockout) and read the drain-off.
The control unit collects run-off from your trays and, at a float level, pumps it away to a drain or bucket. Removing spent solution quickly cuts the standing water that feeds root rot, and catching it lets you check drain-off EC and pH against what went in (see our pH, EC and water quality guide). It's modular — one control unit serves as many trays as you need. Our IWS systems and parts range covers run-to-waste setups.
You need it if you deliberately over-feed to prevent salt build-up in an inert medium; on a zero-runoff AutoPot setup you don't.
What does a good reservoir hygiene routine look like?
A reservoir is a warm, nutrient-rich tank — ideal for algae, biofilm and pathogens if neglected (our root-zone health guide covers Pythium and root rot in more depth). Keep to a simple schedule:
| Task | How often | Why |
|---|---|---|
| Top up with plain water | As the level drops | Replaces water the plants drink without concentrating the salts left behind |
| Flush pipework via the flush taps (30 sec–1 min into a bucket) | Weekly with mineral nutrient | Clears sediment before it blocks drippers or valves |
| Full solution change — drain, rinse, remix (recirculating systems) | Every 7–14 days | Resets EC and pH drift |
| Check in-line filter and drippers | Weekly | Catches grit and biofilm before a blockage |
| Full clean-out with a line/irrigation cleaner | Between crops | Removes algae and mineral scale from pipes, pump and valves |
On a zero-runoff AutoPot grow you top up as the plants drink rather than swapping the tank out; a recirculating dripper reservoir needs that regular full change to stop pH and EC drifting. Keep light off the reservoir either way — a lidded, opaque tank starves algae.
What temperature should a reservoir be, and how do you keep it there?
Warm water holds less dissolved oxygen — and warm, low-oxygen solution is what root-rot pathogens like Pythium want. Aim to keep your reservoir at roughly 18–20°C (64–68°F) and act if it climbs above 22°C (72°F), the point where oxygen drops and Pythium becomes active:
| Water temperature | Dissolved oxygen (approx.) | Root-health risk |
|---|---|---|
| 18°C (64°F) | ~9.5 mg/L | Ideal — high oxygen |
| 22°C (72°F) | ~8.7 mg/L | Upper limit — act above this |
| 25°C (77°F) | ~8.3 mg/L | Elevated — oxygen falling, root-rot pathogens favoured |
| 28°C (82°F) | ~7.8 mg/L | High — pathogen-friendly |
Sources: Atlas Scientific (dissolved oxygen, Pythium) and Agrade Hydroponics (18–20°C target).
To hold that range through a UK heatwave:
- Insulate and shade the tank. Get it off a warm floor, wrap or house it, keep it out of direct light — the cheapest fix.
- Rotate frozen bottles. Swapping sealed frozen water bottles into the tank is a cheap stop-gap for short heat spikes — just keep swapping them.
- Fit a water chiller. A dedicated hydroponic/aquarium chiller such as the Hailea Reservoir Chiller holds the solution to within about ±1°C (±2°F) of target regardless of room temperature — the bigger spend, but the only truly hands-off option.
In winter the problem flips: in a cold room the reservoir can slip below 18°C (64°F), and a water tank heater such as the CB Water Tank Heater brings it back (see our winter grow room guide).
A hot room warms the tank — our guide to cooling an overheating grow tent covers extraction, intake and lights-at-night.
FAQ
Do I need an anti-siphon valve on an AutoPot system? No. AutoPot is gravity-fed and its AQUAvalve is a float valve that shuts the supply off at a set level, so there is no pump-driven siphon to break. Anti-siphon valves are for pumped dripper systems where the reservoir sits above the pots.
Can I run an AutoPot system in winter? Yes. AutoPot is gravity-fed, so it needs no pump, timer or mains power. Watch the reservoir: in a cold room it can fall below about 18°C (64°F), so a water tank heater such as the CB Water Tank Heater can hold it up.
How does an AutoPot AQUAvalve know when to water? It fills the tray under each pot to a 20mm level, then shuts off. Once the plants have emptied the tray, surface tension around the valve breaks and the supply reopens — a self-regulating wet/dry cycle with no timer or power.
What temperature should my hydroponic reservoir be? Aim for roughly 18–20°C (64–68°F) and act if it climbs above 22°C (72°F), where oxygen drops and Pythium root rot becomes active. Cooler water holds more dissolved oxygen (around 9.5 mg/L at 18°C (64°F) versus 7.8 mg/L at 28°C (82°F)).
How often should I clean an automatic watering system? Flush the pipework weekly through the flush taps if you use mineral nutrients, check filters and drippers weekly, and do a full clean-out with a line cleaner between crops to clear algae and mineral scale.
Recommended kit and further reading
The kit we'd point a UK grower to:
- AutoPot systems — the complete gravity-fed range; start with the AutoPot 1Pot Module Kit and add an Extension Kit per plant.
- AutoPot AQUAvalve5 — the heart of the system; pair it with an AutoPot 16mm in-line filter to keep grit out of the mechanism and a reservoir such as the Flexitank PRO, kept covered so light stays off the solution.
- Anti-siphon valves — the safety part for any pumped dripper setup.
- Wilma dripper systems — pumped drip systems for scheduled, adjustable feeds (where the anti-siphon valve earns its place).
- Reservoir temperature: the Hailea Reservoir Chiller for hot rooms and the CB Water Tank Heater for cold ones.
- Easy Feed systems and parts for modular gravity feeding, and the IWS systems and parts range for run-to-waste run-off management.
Most relevant collection: if you only click one link, start with AutoPot — the simplest route to hands-off automatic watering.
Related guides: pH, EC and water quality · cooling an overheating grow tent · hydroponic systems compared · your first hydroponics shopping list.
Why trust The Grow Superstore
We've been helping UK indoor growers since 2009, online and from our Peterborough store (6 Wulfric Square, Bretton, PE3 8RF), and we set up and troubleshoot AutoPot and dripper systems for customers every week — the advice above is what we give across the counter, not theory. Pop in for a free in-store consultation and we'll help you spec a system for your space, your medium and your water. UK Mainland orders over a set value ship free (exclusions apply).